Pages

Monday, September 26, 2011

Crowd Sourcing to Get the Job Done

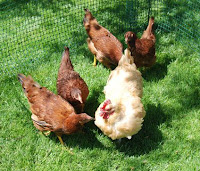
The following bit of photojournalism captures the daily activity inside the Coeur d'Alene Coop.  Madge is quite the attraction to the younger girls when she in on the nest.  I wish I could have recorded the "chicken purring" that occurred during this session!  

Who knew chicken's crowd-sourced this daily hen-house activity?

Hmm, maybe I could use a little input...


Yes, I agree...we need a few more like minds in here...


Everyone, please, come in and have a seat...


Standing room only!


The finished product...job well done one and all!


Sunday, September 25, 2011

Saving Seeds: A Smart Investment for Your Garden's Future

The summer garden is winding its way down and fall planting at the 2nd Street Chicken Ranch is well underway.  The long raised bed, that just a few weeks ago was an overgrown tangle of bush beans, has been realigned and is reemerging in tidy rows of spinach, kale and cress.  The determinate tomato plants have had their final fruits harvested and have been pulled to make room for the garlic.  


While all this reorganizing is taking place, it's also time to start investing in next year's garden by saving seeds from this year's best plants.  I'm pretty selective about which seeds I save and my friends at Baker Creek Heirloom Seeds have nothing to worry about -- I'll still be purchasing plenty of seeds from them once that fabulous catalog arrives.


Saving is Easy


It's pretty easy to save seeds but here are a few thing to note as you get started:

  • If the plant variety is a hybrid, the seed you save may be sterile or will not produce a plant like the parent variety. It's best not to save seeds from a hybrid. Heirloom seeds reproduce well and will keep the variety going...that's how we got heirlooms!
  • The best seeds for a home gardener's to save are from those plants that self-pollinate (or are not cross-pollinated). These include garden favorites like tomatoes, peppers, lettuce, beans and peas. 
  • Choose the best fruit, vegetable or flower.  Fruit should be at the peak of ripeness, but not over ripe.  Beans and peas should be left on the plant to dry.
  • Make sure your seeds are dry -- moldy seeds rot!  Store in an envelope and don't forget to label it with the name/variety of plant. 

Mother Nature is pretty amazing when left to her own devices and you have no doubt encountered a "volunteer" of some type in your garden. This is especially true if you compost or let plants go to seed.  Case-in-point, the free seeding echinacea (cone flower).  I leave the seed heads for the birds but plenty self seed every year.  I have a beautiful garden full of purple and white cone flowers year after year. The same is true with cilantro; inevitably it bolts, flowers and self seeds.  I get a new crop without lifting a finger.


While saving beans, peas and dried seed heads is super easy, tomatoes take a little more effort and is something along the lines of a science experiment, but it's still easy.


Saving Tomato Seeds  


Here's what you'll need:

  • The best tomatoes on the plant at the peak of ripeness.
  • A glass jar or dish for collecting the seeds (one dish for each variety you are saving).
  • A find sieve for straining the seeds.
  • A paper plate for drying the seeds.
Here's how:

1. Scoop out the seeds and gelatinous tomato goo from your prize specimen into the glass jar or dish.
2. Add about 2 inches to 3 inches of water.
3. Move dish to a warm place (I recommend the garage where where fruit flies can really live it up) and let it sit until mold starts growing on the surface in about 2 - 3 days.  Yes mold. I said this was like a science experiment, didn't I? The mold is breaking down that gelatinous goo and freeing up the seeds!
4. Time to rinse the seeds.  Scrape or pour off the mold and dump your seeds into a fine sieve.  Rinse with water, moving the seeds around with your finger to make sure all the goo is washed off.
5. I like to pat the seeds dry with a paper towel and then transfer them to a paper plate to dry.
6. Let them dry thoroughly for a day or two.  Move them around to make sure none are stuck together. 
7. Label and save in an envelope. 

I store all my seeds in an airtight container, out of direct light in the unheated garage. 


Last year I was unable to find seeds of my two favorite tomato plants, the Sun Gold Cherry and the Juliet, so I purchased plants from my favorite supplier at the farmer's market.  I've saved the seeds of both of these varieties to ensure that I have seeds to start next spring!


What has been your success rate with saved seeds?  Anyone interested in a seed exchange?


Thursday, September 22, 2011

The CdA Coop's Top Garden Picks of 2011

It's hard to believe that today is the last day of summer; after all, it didn't really arrive in north Idaho until early August!  In spite of the cold, wet spring which extended in to cool, wet summer, we did manage to have a couple of standouts in the garden this year.

Here's the lineup, starting with the cool weather lovers, since this was their year again. 

Lettuce and Greens:
We had (and continue to have) a fabulous crop of lettuces and greens this year. 
The Lolla Rossa lettuce was beautiful, never bolted or became bitter.  It is a lovely red leaf lettuce and will be back in the garden in 2012.  And then there was the arugula -- we enjoyed this spicy green all summer.  I planted this is succession (and now into the fall). If you haven't planted this before, I highly recommend it.  It germinates quickly and is ready for harvest in 25-30 days.  It's great in salads and lovely braised with a little garlic and bacon (like spinach but with a zing!). 

Beans:
I heard from several gardeners that this was indeed the year of the bean. I went a little crazy this year and planted all my beans at once instead of staggering the plantings.  That led to beans at just about every meal for several weeks. We put in four types of bush beans; green, yellow wax, royalty purple and Dragon's Tongue.  All were productive, but my favorite and the standout was the Dragon's Tongue. This is a flat type bean that starts out green with purple stripes and matures yellow with stunning deep purple stripes and spots. Oh, and did I mention how good they taste?  We blanched, steamed, sauteed and roasted. Gotta love summer's bounty.

Tomatoes:
This was another difficult year for Idaho tomatoes...but we did manage to pull out a few winners.  This year I started more than 50 tomato plants and much to my surprise, they all grew to transplantable size.  Many were given to friends and, I'm happy to say, those plants have been very productive. 

The all around winner for yet another year is the Sun Gold Cherry.  Nothing beats this little, round orb of sunshine.  The sweet flavor explodes "summer" in your mouth and it just keeps on producing.  Plant this one.

Another huge producer this year was the Black Plum.  It's a prolific cherry-type Roma with a deep reddish-brown skin and meaty flavor.  While these are small, they are great to roast and tasty right off the vine.

The Cherokee Purples, a large fruited heirloom, also did well producing lots of meaty, dusky pinkish-red fruits.  These were great sliced on BLT's!

One Morning's Harvest!
And then there was the Green Grape.  I'll be keeping this one around too. It's also a cherry type, very prolific with oval shaped, yellowish-green fruit.  Since this was the first year for this type, I wasn't really certain when the fruits were ripe! It's when they turn a bit yellow!  They are sweet and tangy all at once and look gorgeous mixed in with the Sun Golds and Juliet's.  

It's bittersweet to see the Summer of 2011 come to an end -- all in all it was a pretty good harvest.  Now I'm busy saving seeds (more on that soon) and planting the fall crops...got to get that garlic in next week!

How was your garden this year?  I love to know what your standout were and what you recommend!

Thursday, September 15, 2011

Fall is the "New" Spring

Mid September finds most north Idaho gardeners busy bringing in the last of the tomatoes, cukes and summer squashes.  A late summer heat wave earlier this month really helped those heat seekers move along to luscious ripeness and the bounty is rolling in at the Second Street Chicken Ranch.

But I'm antsy...my summer crops are still going strong.  Why, you ask, is this a problem?  Because I'm ready, and nearly late, for planting the winter crops.  Yes, you read that correctly, winter crops.

Who, in their right mind, would attempt to grow anything in north Idaho over the winter? What with frigid temperatures, freezing rain and several feet of snow? Well, I for one; and I'm betting that there are more.  You see, fall has become the new spring.  Yep, just like 50 is the new 30! (Hey, I'm buying into that more and more these days!). 

It's not impossible -- even here at 47 degrees latitude -- to have a successful crop of greens without a greenhouse.  Last fall I planted spinach, covered it with straw for no reason other than to keep the cats out of the dirt, and this past spring I had the most delicious, tender spinach ever.  Intrigued, I found a book on winter gardening and started planning the winter garden. 

Now granted, you have to plant crops that like the cold and those are limited, but how fun is it going to be to pull carrots in December?  Have beautiful, fresh salad greens right up until Christmas?  And the bonus -- most winter crops overwinter and start regrowing early in the spring -- just like my spinach did last year.  What a great way to get a jump on spring.

So, here I am, happily harvesting the beautiful fruits of summer, but instead of lamenting the pending end of the season, I am eagerly awaiting the next step.  I'm not putting the garden to bed this fall, but freshening the sheets and moving into the 3rd season.  

What about you, any plans for a winter crop?

Friday, July 29, 2011

Oh Snap! Peas Please Me

One of the few benefits to a cool, wet summer is how great the cool weather crops grow. Okay, I'm inclined to say this is the only benefit to a cooler than normal summer. Nonetheless, if you love harvesting fresh peas, non-bitter or bolting lettuce and arugula into August, this has been your kind of summer in north Idaho.

The sugar snaps are fat, super sweet and best consumed right off the vine (most don't make it into the house).  For those that do, our second favorite is tossed in a salad of garden lettuce with goat's cheese or lightly sauteed in a little chicken stock. Yum! 

I just planted a third crop of lettuce, a spicy mesclun mix, along with more arugula.  Even if the dog-days of August arrive, these crops will be fine and will take us into the early fall. 

The cooler weather has the tomatoes a little smaller, but there are lots of greenies and I did manage to pick my first delicious, mini burst of summer delight, Sun Gold Cherry tomato the other day -- with lots more waiting in the wings for Mr. Sun to kiss upon.      

Monday, July 25, 2011

Flock Integration: So Happy Together

Over the weekend we moved our 16-week old pullets into the main coop with our two older hens.  I'm happy to report it was a great success with no bloodshed, no loss of feathers or any real discomfort for anyone (especially me).  Amazing.  I'm crediting this successful flock integration to the "meet and greets" and other factors mentioned previously. 

Combining flocks is something that all urban chicken farmers will have to face at some point if you want the eggs to continue.  It's a fact that younger hens produce more eggs than older hens. The most productive laying period is the first 18 months of the laying hen's life, after that, production tapers off.  

We've been fortunate that Madge, who is just over two years old, still produces an egg every day. Helen, who really is an old biddy at 3 and a half, is a little more sporadic in her laying.  She currently appears to be on vacation...again.  Can you say "Coq au vin?" The good news is that our pullets will start laying in just a few more weeks (laying usually begins between 20 and 24 weeks).  Maybe all that new activity in the nest will spur Helen back into action.

One last minute, secret weapon I pulled out to assist with the move-in was the Flock Block. The older girls love this salt-lick sized block of corn and molasses -- that is, after they get over the initial fear of it being in the coop.  They say "dumb cluck" for a reason!  

After we moved the pullets in the coop, I placed a fresh Flock Block in as a diversion tactic (often a head of cabbage or other special treat is recommended during integration).  Madge set out immediately in what can only be described as major hand-wringing worry...oh my...oh my...somethings different...oh my...what is that?...oh my.... Of course this translated to crowing loudly from the safety of the roost.  In the meantime, Helen took refuge in the back of the pen madly pacing back and forth. The pullets were oblivious to it all!  

Eventually, the youngsters began pecking at the block and of course the older girls jumped right in once they discovered it wasn't going to eat them! Nothing like a little corn and molasses to sweeten the move-in!   

I won't be able to actually test my integration theories until we do this again (in another 2 years), but I'd like to know how you have combined flocks or if the meet and greet idea has worked for you.  Let me know. 


Saturday, July 23, 2011

Sweet 16

The 2nd Street Chicken Ranch is celebrating a Sweet 16 this weekend! Our "chicks" are 16 weeks today and will be moving to the main coop with Helen and Madge.  


After a month of informal "meet and greets" on the lawn, everyone is ready (well, ready or not) to live together.  There is no doubt in anyone's pea-sized brain as to who the ruler of the roost is: Madam Helen; and her Sargent-Major, Madge, makes darn certain that the underlings tow the line.  Such is the way of the pecking order.
Combining flocks is perhaps the most stressful event the urban chicken farmer and the flock will undertake.  I speak from experience. Given last summer's introduction of Madge, and the now departed, Midge, I hoped for a better way. 


The meet and greet concept worked really well for the current flock configuration and here is why:     

  • First and foremost it was neutral territory and not in anyone's coop.
  • We are introduced four young birds to two adults (unlike last summer's situation with two adult birds going in with five adult birds). While the youngsters tested the pecking order, they became subservient very quickly.
  • The older birds couldn't "attack" everyone at once (unlike last year's five against two). In fact, age may have mellowed the older girls -- there has been little blatant attacks on the youngsters. Usually just a glare or raised hackles is all it takes to clear the way for the older girls.
We'll do one more lawn party today and then everyone will retire to the main coop. We're not going the route of "combining flocks in the cloak of darkness;" which is a highly recommended method of introducing new chickens to existing flocks, simply because these girls have already mixed and mingled and have lived next to each other for the last 3 months.
      
The temporary condo coop in will stay put for a few more days, just in case a serious case of bullying breaks out and someone needs to go in "time-out."  
It is amazing how fast the last 4 months have gone by.  It seems like just yesterday we had four fuzzy, yellow chicks.  And just think, in another four short weeks, we should be getting our first eggs.  My, my how fast they grow up and leave the nest.    


Monday, June 13, 2011

Getting to Know You

We held our "Hens & Chicks Meet & Greet" over the weekend and I think we've found a way to ease the drama, trauma and pain of small flock integration. 

And what a relief that is, given the trauma endured last August when we integrated two new hens into our flock. It was so bad, we ended up sending two from the original flock (the bad-girl bullies, Henny and Penny) to live with a much bigger flock "on the farm" (can you say chicken-stew?). 

Helen and Madge, our two remaining hens, are fairly low key. Helen is queen of the roost, but she and Madge get along. The chicks are 10 weeks old and are almost as big as the hens (in body size only - the hens outweigh the chicks by several pounds).  

Are you my Mother?

Getting everyone together in a neutral setting was the key to the Meet and Greet's success.  We used a 25' length of plastic garden fencing to create a "playpen" on the lawn. In went the chicks, who were delighted to be out of the coop, although clueless as to what to do. 

Since Helen was busy sitting on the nest, I scooped up Madge and tossed her in the pen. And waited... 


Testing the pecking order.
Ah, youth.  A time to spread your wings. To flap off in the face of authority. To find out just where you stand in the pecking order. A time to discover you're not at the top of the order. 
It didn't take Madge long to put Marigold in her place and let everyone else know that when Helen is away, Madge rules. With nothing more than a glaring look in their direction, the chicks quickly learned that blonde means business. 

Helen meets the chicks

Enter Helen, fresh off the nest, confident in her role as ruler of the roost. Holding my breath, I dropped her in.... I have to admit, I was expecting something more from Helen.  Not that I was disappointed, but she really didn't seem a bit interested in the chicks. In fact she was content to eat grass and peck around; that was until Ms. Marigold decided to test the pecking order again.  Wowee - what a dust-up!  In a quick as lightening flash, Helen delivered a sharp peck to the back of her head and that was enough to put everyone in their places.   

Helen dominating. Note the two chicks on the right - fleeing.

The chicks quickly learned to respect the elders and the elders, beyond a couple more glaring looks or threatening stances, basically ignored the chicks.  

We did a second play date on Sunday with similar results...no drama, trauma or pain.  We'll have a few more of these Meet & Greets over the next few weeks. Call me old-fashioned, but I think it's good to get to know one another before moving in together!

Birds of a feather


Saturday, June 11, 2011

The Basil Bust

I love basil.  Its heady, sweet smell is an instant reminder of summer, warm sunshine and tomatoes.  During the winter months I purchase living basil (hydroponic) and come early March, it's the first seeds that I start.

Unfortunately, for the second year in a row, the beautiful flat of basil which I started and nurtured during the cold, wet spring has succumbed to just that -- the cold, wet spring.  Arrrrgh!  You'd think I'd learn after going through this last year.  Basil, of all the herbs, is incredibly delicate and require warm temps to survive. And that just something we just haven't had a lot of here in Coeur d'Alene this spring. 

I'm not alone in this crop failure, as friends have lamented that their tiny basil purchased at Farmer's Markets are also failing.  But, there is good news! It's not too late to start basil from seed outside in pots or in the ground.  In fact, right now is the right time!

About 9 days ago I seeded two pots and tucked seeds in along the edge of the tomato beds. Today I have tiny basil sprouting from pots and the ground. One packet of seeds at $1.99 will yield more than enough basil --and it will be ready just in time for ripening tomatoes in August.

Maybe next year I'll learn my lesson and just sow basil outside in June. Probably not though, I'll take my chances and hope that next spring will be warm and sunny.  The gardener is an eternal optimist! 

Friday, June 10, 2011

Time for the Manito Plant Sale

It's time for the Friends of Manito Spring Plant Sale at the Manito Gardens in Spokane, WA., this Saturday, June 11 from 10 am to 4 pm.   This is a fabulous sale for plants (just download the 19 page list to see everything they're selling!).  It is a fund-raiser for the gardens, so while the plants are not necessarily "bargained-priced," you are going to find a terrific selection of healthy and unusual plants. 

Purple Loosestrife

I went to the fall sale last August (they do two each year - spring and fall) and came home with an assortment of goodies: grasses, cone flowers, purple gooseneck loosestrife, Solomon's seal, sea-hollies and more.  I'm happy to report that everything wintered over and looks great. 

If you are in the Spokane area, don't miss these sales!

Friday, May 27, 2011

Ambitions and Abundance

In addition to this blog, I keep an "old fashioned" garden journal - one I write in just about every weekend.  I usually start writing in January - listing out the new seeds or plants I want to try - and wrap it up in October with the "most successful" list for that garden season.

This year my January wish-list was huge and I quickly realized that I would need way more land than what our small, urban backyard could supply.  I needed to scale back the list and get realistic as to what I could grow successfully (like 14 types of tomatoes that resulted in more than 50 tomato starts!).

We have four 8' x 4' raised beds and one 16' x 3 bed; a couple of smaller herb/flower beds and a perennial flower bed (which keeps getting smaller and smaller as the number of raised beds grow).  I got 18 tomato plants in the ground last weekend -- all those that I can accommodate - and that spurred me to take inventory of the edibles that are currently "in the ground."

Tomatoes (14 types), potatoes (3 types), grapes (2 types), arugula, lettuce (3 types), radishes (3 types), basil (4 types), sage, thyme, cilantro, chives, oregano, rosemary, garlic, fennel, purslane, spinach (already harvested), cress, chard, beets (2 types), carrots (4 types), onions (3 types), shallots, peas, peppers (2 types) and strawberries. 
Early Radishes


Still to plant:  bush beans (4 types), cucumbers (2 types) and squash (2 types). 
I was amazed at the list.  I am amazed at my ambition and the pending abundance. It's a good thing I cut down my wish-list in January.  Maybe the 2nd St. Chicken Ranch needs to start its own CSA!

Saturday, May 21, 2011

Time to Plant Those Tomatoes

It's been another cool, wet spring in north Idaho, but I think we are finally out of frost danger.  The 50+ tomato plants that I started in early March have been hardening off in the covered hoop bed for about two weeks.  We've been monitoring the overnight temperatures pretty closely with the help of a thermometer with a remote sensor and this has worked really well. 

When the temp is going to dip below 40 at night we cover the plastic with another "blanket" -- a heavier, blue tarp.  This has helped, along with the few sunny and 70 days we've had so far this year.

I have to admit, the starts look great and I'm calling the "starting tomatoes from seeds" a big success this year.  Now on to the next step - getting them into the ground.  We have two beds dedicated to tomatoes and this year I am trying something new.  Instead of the traditional tomato cages for support, we are going to try the cattle panel idea.   

We purchased a 16 foot section of cattle panel - we'll put an 8 foot section into each bed.  I'm still researching the best planting scheme.  Some people have put the panel down the center and staggered 3 or 4 plants on either side.  Another placed the panel about 1/3 into the bed and planted 7 on one side, allowing for a row or two of other crops in the same bed.  Either way, I'm not going to get 50 plants in! 

Stay tuned -- I'll post photos and the final outcome later this week!

Friday, May 20, 2011

New Chicks on the Block


Madge and Helen check out the new neighbors.
Our new girls have settled nicely into their brand new, one bedroom, starter home. It's pretty exciting to move into a new house and get to know the new neighbors -- especially when the old biddies next door are the "mother hen" type...so to speak. 
After much discussion on the type of pen we were going to build, Hal and I settled on a pre-made "chick-n-pen" from the farm store. It fits perfectly on the mini coop and provides enough space for the chicks to roam around.  A leftover piece of fiberboard (which already matched the paint) was added to keep the rain at bay.  

These are temporary digs for our chicks, who are now 7 weeks old.  My goal is to have a combined flock living under one coop/roof by week 16 (mid-July).  My integration strategy includes a couple of "meet and greets" inside the confines of a large, plastic-fenced pen.  All that tasty, green grass will surely provide a distraction for the big girls...at least for a few minutes. 

Given our past experience with flock integration, I'm hoping these backyard play dates make the transition easier for everyone -- especially those of us without wings and beaks.   

Wednesday, May 4, 2011

Cinco de Mayo Pesto

The May 2011 issue of Bon Appetit has a great recipe for Chive Pesto.  In addition to chives it also calls for parsley.  Since I'm not a big fan of this herb, I decided to try it with cilantro.  With a couple of ingredient swaps (lime for lemon and a dash of hot sauce) you have Cinco de Mayo Chive Pesto! 

It's a super easy and delicious way to use those spring fresh, onion-y chives growing in your garden.

1/2 cup chopped chives (packed)
1/2 cup cilantro (packed)
2 Tbs pine nuts (more authentic Mexican would be pepitas/pumpkin seeds)
1 clove garlic
2 Tsp fresh lime juice
Dash of bottled hot sauce (to taste)
1/2 cup olive oil

In a food processor add chives, cilantro, nuts and garlic.  Pulse until chopped. With machine running, stream in olive oil until combined.  Whirl in lime juice and hot sauce. Add salt and pepper to taste.

This is great on grilled fish, chicken or veggies and, as the original stated, great on roasted potatoes too.   Delicioso!
 

Tuesday, May 3, 2011

A Sure Sign of Spring -- Farmer's Market!

This Saturday, May 7th, the 2011 Kootenai County Farmer's Market season opens!  Come rain (probably) or shine (hopefully) the vendors will be there with a fantastic assortment of flower, herb and veg plants, fun art, yummy eats and great music! 

The Saturday market is located at the corner of Hwy 95 and Prairie Ave., and runs from 9 am to 1:30 pm.  A Wednesday market is held in downtown Coeur d'Alene at Sherman Ave. and 5th, from 4 to 7 pm.

We never miss "opening day" and this year is no exception. Even though I have 50+ of my own tomato starts (and could be a vendor!!), I will be searching out a Sun Gold Cherry, Juliet, and a Black Prince.  Two of my favorite vendors are Killarney Farms from Cataldo, ID (nice variety of tomato plants and greens) and the Idaho Tomato Lady / Mountain View Farm, from Hayden, ID. 

If you go and succumb to the temptation of purchasing tender annuals (like tomatoes, peppers, basil) make sure you keep them in the garage or sheltered area.  It's still too chilly to put them in the ground!  Last average day of frost is May 15 for this area.  I usually try to get my tomatoes in by the May 20th - but let Mother Nature (and your soil's temperature) be your guide.

Here's to Farmers' Markets, joy they bring to welcome Spring!

Thursday, April 21, 2011

House Those Hens for Under $10: How to Build a Chicken Coop on the Cheap!

Our chicks are just about 3 weeks old and it is amazing how fast they grow.  They don't look anything like the cute, fuzzy balls of fluff we brought home at the beginning of the month.  They are still living in our family room in a clear plastic Sterlite tub, but the time is coming for them to move on up and out of the house! 

Integrating chicks with adults is not a good idea, but eventually everyone is going to have to live together.  Until that magical moment (I'll have more to say on that topic in a future post), we need temporary "outdoor" housing for the growing brood.  Our local farm store advertised a swell looking small coop for $239 - yikes!  And a search on Craig's List returned few options as well.  With time running out (who wants month old pullets living in the house?), we turned to the DIY plan.

Hal sketched out a basic salt box coop design and we were off to the home improvement store.  We purchased two 4 x 8 sheets of OSB plywood ($6.97 each!!) and we were on our way to a new temporary coop. Within two hours we had the basic structure together. We ended up using just one sheet of the OSB plywood.  The roof and floor came from a few pieces of plywood we had left over from other projects; otherwise we would have needed the second sheet.  We also had screws, the 1x corner supports, roof hinges, decorative trim and paint. Our cost in this has been our time and about $7. 

I am confident that you could build something similar for well under $50 with supplies from a Habitat for Humanity store or similar second hand building supply store.

It's with screws, so when the chicks move into the main coop, it can be dismantled and stored.  It will be great to have on hand for future juvenile housing or for any reason that we need to separate flock members.

The coop measures 3 feet across, 3 feet tall in the front and 28 inches tall in the back and 32 inches deep.  The roof is hinged and lifts up from the back.  It will sit on four 4x4 posts about 18 inches off the ground.  This is a perfect size for four growing chicks.  Since this is only temporary housing, we don't need to worry about nesting boxes - by the time they are ready for that, they will be in with the big girls.  However, there is room for a nest box and it would be perfect for two to three hens. 

It's not done yet as we still have to get a few more coats of paint on it, add vents, attach the door and ladder.  Then comes the pen construction.  We've going with the "row house look" as it will be placed right next to the main coop.  Stay tuned for that project.

If you would like the actual dimension of this Salt Box coop, let me know in the comments and I'll send you the details!

Wednesday, April 20, 2011

Chicken Little Grows Up...Fast

I am still amazed at how fast chicks grow!  Our new chicks - Marigold, Petunia, Violet and Rose - are just about three weeks old.  See how much they've grown since joining the Second Street Chicken Ranch on April 2nd.

                         
Here are our fuzz-balls on April 3rd


And a few days later on April 8th - notice the wing feathers and tiny tail feathers.


On April 15th - starting to get chest feathers

And on April 20th, starting to get the "uglies" - but they still have baby faces!

Tuesday, April 12, 2011

Make Your Own Seed Tape From TP

Don't you just love a neat, tidy and evenly spaced row of vegetables in your garden?  Maybe, if I'm lucky, I can get a straight row, but the evenly spaced thing is another story.  Really, have you seen the size of carrot and lettuce seeds?  Once they leave the confines of that white envelope, it's any one's guess as to where they go in the row.  

And, I admit it - I am a terrible "thinner."  I should embrace the micro-greens/veggie trend; you know, where you eat the tiny little thinnings - this would make it easier for me to yank them out. 

I have discovered a simple and quick solution to both of these problems - make your own seed tape using toilet paper!  Really, think about it - it's biodegradable. I discovered this nifty idea at Garden Girl TV blog . 

Making your own seed tape is easy:

1.  Tear off 4 or 8 feet of TP (depending on how long your raised beds are).  Each TP square is 4 inches, so for a 4 foot row you need 12 squares.

2.  Cut the strip in half, so you now have two 4 foot lengths

3.  Make a simple paste of flour and water (about a teaspoon or so of each).  This will hold your seeds in place and seal the "tape" when you are done.

4.  Using a small paint brush or toothpick, dab a little paste at the required spacing for the veggie you are planting.

5.  Apply the seeds on the spot of paste.

6.  If needed, add a couple extra dabs of paste on the tape and fold over to seal.

7. Plant your tape!  The TP and paste are biodegradable and your seeds will be evenly spaced.  No thinning required!

I made a couple of seed tapes for carrots and lettuce is next.  Then I just need to get them in the ground! 

Wednesday, April 6, 2011

Indoor Farming

Well, it is April 6th, and in north Idaho we are still waiting for spring.  Oh yeah, the usual signs are all around -- tulips are pushing up, grass greening up - but the temperature certainly is not up.  As eager as I am to get out there and do something in the yard, Mother Nature has kept me inside.

What's a urban farm girl to do?  Move the outside inside! Family-room turned Farm-room.  We are lucky to have a very large, south-facing window in our family/dining room and this local has been where I have been starting seeds for the last few years.  I started basil and tomatoes in early March and have been transplanting the starts to individual pots over the last week. 

Currently I have more than 50 tomato plants.  When the temperature is consistently above freezing at night, these will all be moved out to the covered beds outside; but for now, they are living in the warmth of the farm-room!   

And, what's a farm-room without livestock?  Not much, so last Saturday the 2nd Street Chicken Ranch added four new chicks to our flock.  After losing another girl in March, we decide we needed to restock the coop.  Our new chicks are Rhode Island Reds and Production Reds (a RIR and New Hampshire Red cross).   Of course these peeps are way to small to mix and mingle with the big girls, so they are living on the other side of the farm-room in their very own luxury condo.  They'll be hanging out in the house for another week or so then be relocated to the garage. 

It was a tough decision between going with 4 month old pullets and having eggs at the end of May; or fuzzy chicks to hand raise and get eggs in September. Since we still have two big girls, we went with chicks. 

Between hail storms I have managed to plant arugula, lettuce and radishes in one covered bed (they are popping up like mad) and onions and shallots in another bed (uncovered).  Still have lots to do...understatement with 50+ tomatoes staring back at me! 

Hope you have all wintered well!  Let me know what your 2011 garden plans are and how your livestock is doing!!

Monday, January 3, 2011

Happy New Year!

Wishing you a Happy New Year
and a very successful year of gardening and chicken farming!


Happy New Year from the Coeur d'Alene Coop


Related Posts with Thumbnails